The Unlikely Writer

Loved this :)) check out my best friend’s blog!

The Life of Sameen

Strap in kids, this is gonna be a long first post.

Growing up, I always hated writing, I never liked it at all. I thought it was a nuisance; that we were being forced into writing these long essays for reasons beyond what my 8 year old brain was capable of thinking at the time. I would only write if our teachers were forcing us to, which made me dislike writing even more.

The thing is however, my teachers and my peers alike always told me that I was a good writer. It wasn’t until I won a spooky story writing contest in elementary school until I realized that “hey, maybe I am kind of good at writing!” Okay, that sounded really conceited, I’ll try to do less of that. My apologies.

From 1st grade to 7th grade, I went on hating writing. I wrote countless of pieces during that…

View original post 1,183 more words

GLOW UP: Get the ULTIMATE Highlight!

Hi, lovelies.

You’re about to learn how to get the Instagram-worthy, poppin’ highlight. This technique is also known as strobing, and is raved about by makeup artists and celebrities alike.

  1. First, have your face makeup finished. If you don’t know how to highlight and contour, check out my previous blog post: How To Add Luminosity and Definition to Your Face. The shimmering highlight product is a finishing product, and it is best to apply after foundation, powder, matte highlight, and contour product.
  2. To make your highlight brighter, I reccomend applying a setting spray or face balm beforehand. This will create a sticky base for your makeup to hold on to. The Mario Badescu Rose Water Spray is a staple in the beauty community. It’s a refreshing mist formulated with rosewater and herbal extracts. You can use it afterwards as well since it does not disturb makeup.
  3. When choosing your highlighter, think about your selection so it fits your skin tone and undertone well. Lighter hues compliment medium/light skin shades well. On deeper skin, highlighters with silver and golden undertones are absolutely stunning! The Anastasia Beverly Hills Glow Kits in Sun Dipped and That Glow are amazing. You can create so many different skin finishes with just one product. The NYX Cosmetics Illuminator is also a great option for brightening your skin and giving it radiance.
  4. When applying your product, think about the type of brush you’re using. Use a large fan brush for even application and full coverage of the product. You can also use a tapered highlighting brush for more control. Focus the product on the high points of your cheekbones and sweep up toward your temples. You can also use the product along the bridge of your nose, cupid’s bow, inner eye corners, and brow bone. Be careful when using it along the smaller areas, as a little goes a long way. You can also add it along your neckline and decollate.
  5. This last step is optional, but I recommend adding a microfine shimmering product on top. A lot of these products have light-reflecting particles, so it will show up well in photos. An example of a microfine shimmering illuminator is the Urban Decay Naked Illuminated Shimmering Product.


Thanks for reading! xoxoimg_5231

Update: Ramadan, Makeup Tutorials, and more

Hi, lovelies.

So, I have been busy because I’ve been observing the month of Ramadan. If you are celebrate it as well, then Ramadan Mubarak to you! I’m so excited about the holiday at the end of this month, Eid. I’m even thinking about doing an Eid makeup tutorial! I don’t own a camera..not sure how it’ll turn out, but hopefully we’ll see what happens as I plan for it. For those of you observing Ramadan, take this time to better yourself as a person. It is truly the most wonderful time of the year. 🌙✨

Thank you everyone who reads and enjoys my blog.  ❤️

8 Desi and Middle Eastern Beauty Bloggers You Need To Follow Right Now

Hi lovelies! 🙂

If you’re a Desi or Middle Eastern girl, there’s a lot of makeup struggles only we understand. Such as destroying your dark circles completely or choosing a foundation that isn’t too yellow for your skin tone. These girls have the same beauty problems but they know for sure how to fix them! They take the traditional tumeric face mask our mom taught us and put their own spin on it. They’ll teach you the Arabic-style eye makeup. They’ll teach you how to tame thick brows. There’s so much for us to learn from them! Here are my top 8 favorite South Asian and Middle Eastern beauty bloggers..

  1. Farah Dhukai


2. Huda Beauty

3. Irene Sarah

img_5868


4. LookaMillion5. DressYourFace 

6. Kaushal Beauty

7. Doniya Beauty


8. Faryal Makhdoom


xoxo,

5 Gorgeous Pairs of Lace Up Heels You’ll Be Swooning Over

Hi everyone,

Lace up heels are my favorite statement shoes of all time. They are a staple item in every fashion blogger’s closet. There are so many beautiful styles of this shoe,  from the classy and cute kitten pump to the gladiator sandal. Here are my top ten favorites!
1.  


Get them from WantMyLook.

2.  

 Hurry, they’re running out soon! Buy them from Lulu’s

3.  

 
Get these cute pairs from Nasty Gal.

4.  

 From MakeMeChic.com

5.   Order them from ASOS.

Are you going to be rocking this cute trend this spring and summer? 
*this is not a sponsored blog post. 🙂 
Xoxo, 


4 Super Sweet Lip Colors To Try This Valentine’s Day

Hi lovelies,

It’s been a while since my last blog posts, and I’m so, so sorry. For those of you that are full-time students, I’m sure you know the struggle of keeping up with your schoolwork and blog-work! 😛

It’s Valentine’s Day next week. I’m sure we all have different plans. Whether you’re going to paint the town red with your girls or stay in for a cozy night with your special someone (in my case – my cat), here are some classic and not-so-traditional lip colors to rock on the day of love.

 SIMPLE BUT SWEET

This nude baby pink shade by Tarte Cosmetics (one of my favorite cruelty-free,”eco-chic” companies) offers high pigmentation that’s going to last all throughout the day. It has a velvety, matte finish that’s not drying – exactly what we all look for in a lip stain.

2086

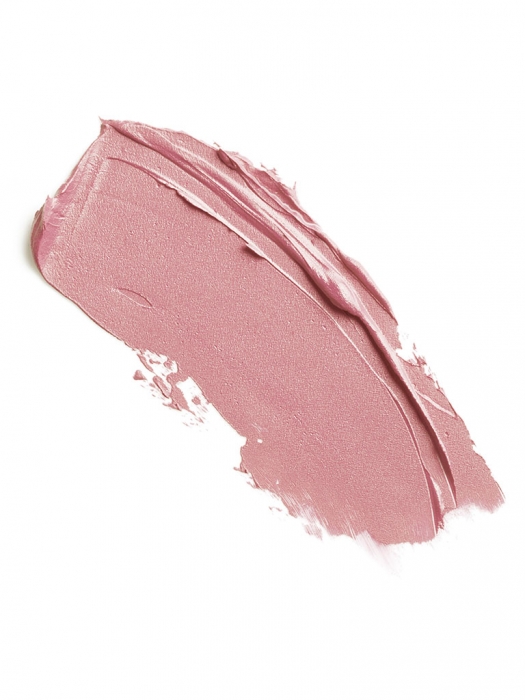
tarteist™ lip paint in the shade namaste, $20

ROSY RED

You can never go wrong with a bold red lip. Prep the lips with a lip scrub like this Lush Valentine’s Day lip polisher. Then use a lip balm like this lip conditioner infused with Vitamin E and rosemary extract before applying the lip color to ensure intense color payoff. Using this NARS Velvet Matte Lip Pencil  in the shade Dragon Girl, create a precise lip shape following the contour of your lips. If you want to create an illusion of fuller, larger looking lips, outline just a little outside your natural lip line. Fill in your lips with the pencil and blot with an oil absorbing sheet to pick up any residue oils on your lips, reapply, and blot again. This will make sure your lip color stays in place and doesn’t slip and slide.


0607845024576

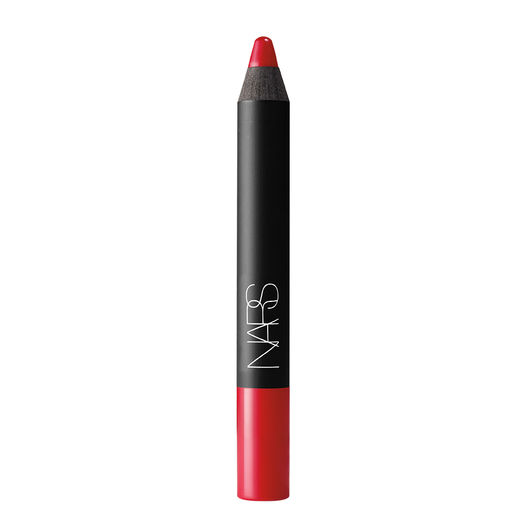
NARS Velvet Matte Lip Pencil – Dragon Girl, $26

INNOCENT PINK

This lip color is probably the only one on this list I’ll be rocking myself  🙂 If you want just a hint of color on your lips, try Maybelline’s Baby Lips Lip Gloss in Pink Pizazz.

BABYLIPS-GLOSS_PINK-PIZZAZ_pack-shot

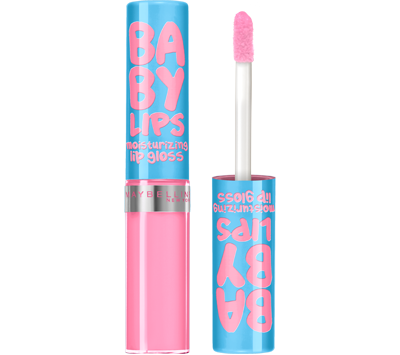
Maybelline Baby Lips Moisturizing Lip Gloss, 50 Pink Pizazz, $9.28 on Amazon.com 

PRETTY PURPLES

It seems a bit unexpected for this holiday, but magenta, violet, and plum shades are on trend this year. It compliments those with darker skin tones well. A full coverage, soft lipstick is your holy grail beauty product.

Long Last Soft Matte Lipstick

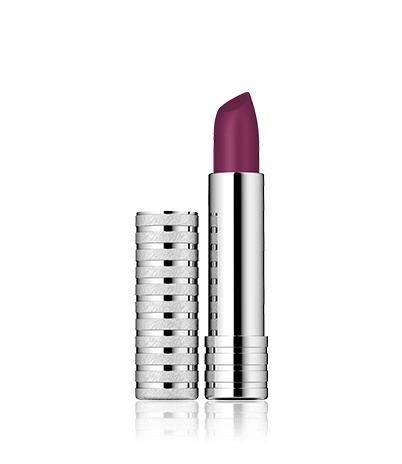
Clinique Long Last Soft Matte Lipstick in “Matte Plum”, $17


What lip colors will you be wearing this Valentine’s Day? Let me know in the comments below.

xoxo


A Clay Face Mask For Nourishment

Hi lovelies,

Hope you are all having a very happy new year so far. Hard to believe it’s already 2016. 91WeXXiZl6L._SX522_

I heard about this Indian Healing Clay on so many beauty blogging sites. Clays have been used for centuries to refresh the skin. These masks have several benefits for those with skin on the oilier spectrum because it can make their pores appear smaller. The label on this particular mask claims that it is the “World’s Most Powerful Facial”. According to the website, it contains “100% natural calcium bentonite (green) clay”.

I’ve never personally tried this face mask, but hopefully I do soon iA.

If you’ve tried this mask, let me know what you think of it in the comments below. Or, write about your personal favorite face masks!

xoxo

Bisma


The Art of Henna/Mehndi

Hi everyone,

Henna is a paste that comes from a flowering plant and is applied directly to the skin as a temporary body paint. It has a lot of significance in my Pakistani culture and is used in other South Asian and Middle Eastern countries. I’ve been surrounded by mehndi (the term that I mostly know henna as – so I’ll just use that word throughout the article) my entire life. I usually apply Mehndi on special days like Eid or weddings. Bridal henna is on a whole other level. This past summer, my older cousin got married and her mehndi was so beautiful and covered her entire arms! Here’s are some tips and tricks on how to master the perfect henna design.

  • Know where to buy mehndi – and making sure it’s safe  The safest bet could be your local South Asian/Middle Eastern store – this is where I usually purchase my mehndi. However, you can easily find them online as well. Just make sure you’ve read the reviews and checked the list of ingredients to make sure there’s nothing you’re allergic to. It usually comes in cone or syringe form. Do not buy black henna, as it’s usually considered unsafe and is illegal in some parts of the world!
  • After buying the mehndi, find designs you like – there are endless options. I think that traditional designs are best. However, if you’re just beginning, go for an easier route. Start with little flowers and dots before you go for an extremely detailed designed.
  • Know what precautions to take – When the mehndi is applied, you must be very careful. Try not to use that hand that you’ve applied the henna on too much until after it dries. You shouldn’t wash it off immediately after it dries however. There would be no color payoff then! You will have to sleep with it on overnight for the deepest, richest color. Before you remove in the morning, make sure to use a bit of sugar and lemon on the paste to get more color vibrancy.
  • Practice, Practice, Practice! It’s important to know that no one is a mehndi master the first time they apply. A lot of girls I know who are practically pros at this were struggling when first starting out. So don’t give up hope just yet! It’s about expressing your creativity through mehndi, so it should be fun!

Are you going to start using mehndi? What designs do you like best? Let me know in the comments below.
xoxo,

Bisma

The Benefits of Rose Water

Hi everyone,

Rose water is a soothing and natural ingredient with many skin-enhancing benefits. I love the scent and it can hydrate dry and tired skin.

  • Rose water is used in emollients, eye creams, and body lotions.
  • Rose water is an amazing skin refresher and can help reduce signs of fine lines and wrinkles.
  • Great product for the skin, hair, and even home

Rose water is very affordable and my mother usually buys them from the Indian-Pakistani/Middle Eastern store. I’m pretty sure princesses used to use this product in their daily beauty routine. Here are some ways to incorporate this multitasking ingredient into your own. Just make sure that your rose water is all natural and has no excessive additives.

  1. Use it as a toner. Toner is an essential item in an oily skin routine. Rose water will have a lightweight, airy feel on your skin and reduce bacteria, decrease inflammation, and refresh the skin. Use this after cleansing your skin and it will feel as though your skin just drank gallons of water. This is because the rose water has several softening, brightening, and toning effects.
  2. Fragrance – Apply a bit of petroleum jelly to the area before you apply this rose water. This will make sure this fragrance stays put longer. Dab a bit on your neckline, behind the ears, and on the wrist for a light and sweet scent.
  3. Make a rose water facial mask! While it’s sitting on your skin, it might feel a lot like a cleansing veil or essence. You can add 2 tablespoons of the rose water, 3 tablespoons of organic honey, and 2 teaspoons of coconut oil into a bowl and apply this on your skin. The honey has antioxidants that can promote healing acne and the rose water will leave skin feeling soft and supple. Coconut oil is naturally antibacterial, anti-fungal, and moisturizing so it will clean the skin and make it appear healthier looking. It also contains vitamin C, which can help fight off free radicals and it can stimulate collagen production.

Hope you find these tips simple. What’s your favorite way to use rose water?

xoxo,

Bisma

Winged Liner Know-How

Hi lovelies,

maxresdefault

I’m so sorry I haven’t been blogging for a few weeks. I just started school and I do have a pretty hectic schedule. Thank you all for being so patient.

Anyways, today we will be talking about one of the most classy and elegant eye makeup looks of all time – winged liner. It certainly does take quite a bit of skill and it all comes down to eye shape. But this tutorial will help you learn to apply eyeliner like a pro.

  • First of all, find which type of liner works best for you. Liquid, gel/cream, or pencil?  One of my favorite gel/cream liners of all time is the MAYBELLINE Eye Studio Lasting Drama Gel Eyeliner.  However if you choose liquid liner, the 24/7 Waterproof Liquid Eyeliner is a favorite by beauty thrill seekers. And if you like the crayon/liner route the best, use a richly pigmented liner with an emollient texture like this Em Cosmetics by Michelle Phan Waterliner.  Gel liners usually have a thicker consistency and can give you an intense line – thin or thick. That’s why I prefer gel liner. You can apply a thin, crisp, even line on the top lash line to define the shape of your eyes during the day and then build it up and smoke it out for a sultrier night look. You can also use a variety of brushes with gel liner (usually because it’s in pot form) like this extra fine tipped thin liner brush or an angled brush with firm bristles.
  • If you feel that your hand is too shaky when you begin applying, try resting your elbow on a flat surface when applying. This way, you can give your hand more support and there’s a smaller chance of messing up.
  • If you start from the inner corners of the eyes, look to the right in the mirror. If you start from the outer corners, look to the left in the mirror.
  • Start by making small strokes along your upper lash line and connect each line along the way. You could also outline the shape of the liner and fill it in with the product afterwards. Remember to follow the shape of your eyes and when it comes to the wing, draw a scalene triangle. If you happen to make any mistakes along the way, simply take a bit of coconut oil or olive oil on a Q-tip and use this to remove any liner marks along your eyelid or crease.
  • Now that you’ve finished your liner, use a highlight shade underneath the liner the bring it forward. You can use a matte vanilla color or flesh-tone concealer for this step.

Follow this guide and you’ll master this in no time! Practice makes perfect and no one applies eyeliner ever so perfectly the first time! Haha! :)) Have a wonderful day!

xoxo,

Bisma